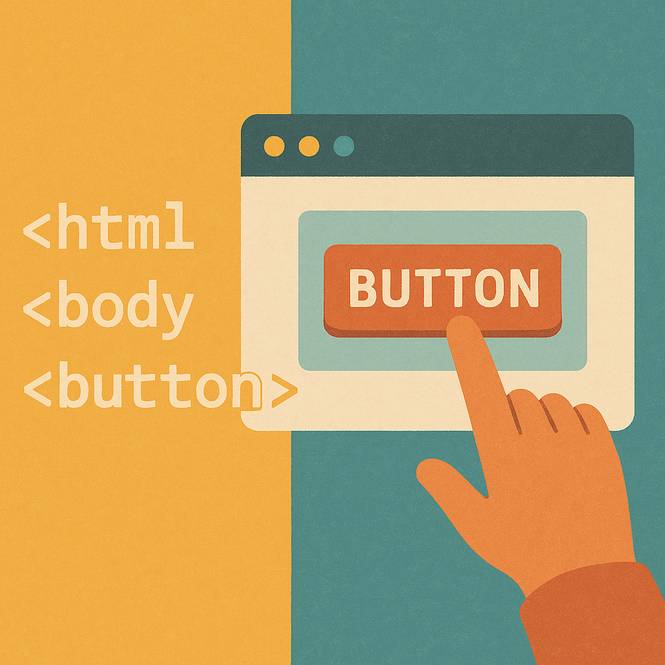
Hey there, future web wizard! Have you ever clicked a button on a website and watched something cool happen? Maybe a pop-up message appeared, or the screen changed colors? Buttons are like magic doorbells, press them, and something exciting happens!
Today, you’ll learn how to create your very own button using three awesome coding tools:
* HTML → The structure (like building a toy car frame).
* CSS → The decorations (painting the car and adding stickers).
* JAVASCRIPT → The engine (making the car zoom when you press a pedal).
By the end, you’ll have a button that looks great and does something fun. Let’s dive in!
What is HTML?
HTML (HyperText Markup Language) is like the skeleton of a webpage. Just like how your bones hold your body together, HTML holds all the pieces of a website in place.
Creating your First Button
To make a button, we use the tag. Here’s the simplest button ever:
Method 1 Using HTML to Add the Foundation
Code Example
HTML Button Structure
<button onclick="sayHello()">Click Me!</button>Code Explanation
<button> → This tells the browser, ("Hey, I want a button here!")
Click Me! → This is the text that shows up on the button.
</button> → This closes the button ("Hey, I'm done!").
onclick="sayHello()" → This is JavaScript, when the button is clicked,
a pop-up will appear.
Try it Yourself!
Open JSFiddle online editor (a fun online coding playground).
Paste the code above into the HTML section.
Ta-da! You’ll see a plain button.
But wait… looks boring right? Now for the fun part!
Method 2 Styling the Button with CSS
What is CSS?
CSS (Cascading Style Sheets) is like the paint, glitter, and stickers for your webpage. It makes things look pretty!
Let's Make the Button Pop!
Add this code inside a <style>tag in your HTML:
Code Example
CSS Button Styles
button {
    background-color: blue;
    color: white;
    padding: 10px 20px;
    border-radius: 5px;
}Code Explanation
background-color: Sets the button color to blue.
color: Sets the letter text to white.
padding: Adds space around the text "Click Me!"
border-radius: Makes sharp button corners smoother
Fun Experiment:
Change color to #4CAF50, or add your favorite color, like (#FF69B4 for pink!).
Adjust border-radius to 50px—now it’s closer to a circle!
Method 3 Making the Button do Something with JavaScript
What is JavaScript?
JavaScript is like the brain of your button. It tells the button what to do when someone clicks it!
Adding a Click Reaction
Let’s make a pop-up message appear when the button is clicked.
Code Example
JavaScript Action Button
function sayHello() {
    alert("You clicked me!");
}Code Explanation
onclick="sayHello()" → When clicked, JavaScript runs the "sayHello()" function.
alert("You clicked me!") → Makes a pop-up message appear that says
"You clicked me!".
Now that you learned how to activate and create a basic HTML button, your next step is to disable a button. At times, you will need to disable an HTML button to prevent users from interacting with it. Or, your company is upgrading their software and need you to turn off the button until all upgrades are done.
This lesson "How to Disable an HTML Button" will guide you step by step with simple solutions.
Tools and Resources
Code Editor
Visual Code Studio - beginners and experienced coders use this popular coding editor to build their projects. VCS is completely free to use, open-source software. You can use this software to practice building your first HTML buttons.
Online Code Editor
JSFiddle allows quick testing of your HTML buttons by giving you a testing sandbox. Users can place code in the HTML, CSS, or JavaScript window to perform tests. Students use this software to test their code before committing to it.
Documentation & Learning
MDN Web Docs is a place where many students go to learn about coding techniques. MDN WD has extensive up-to-date information about coding languages like HTML, CSS, and JavaScript. Besides documentation, they have real life coding exercises for students to practice.
W3Schools is a great way to practice how to code. They have simple coding projects that teach the basics of HTML, CSS, and JavaScript. They also have an online editor where you can test your code.
Infographic Analogy
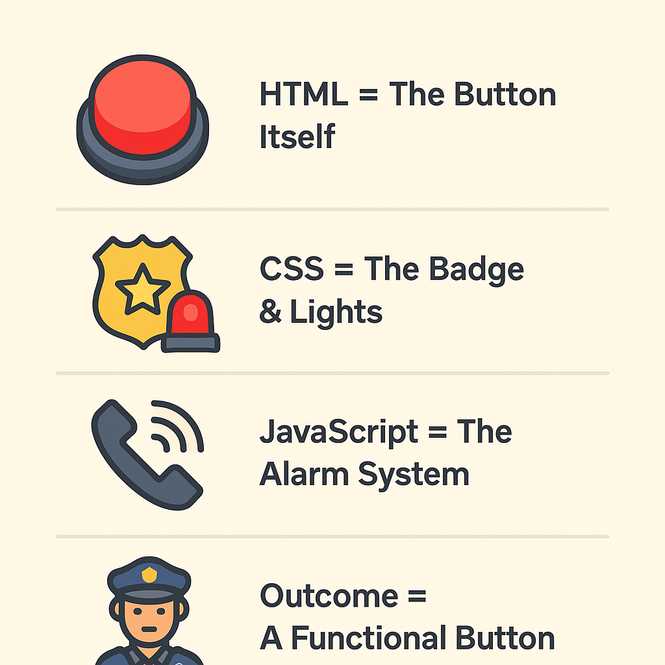
This infographic compares creating an HTML button to setting up an emergency panic button at a police station. Officers or citizens use it to signal for help.
1. HTML = The Physical Panic Button on the Wall
When building an HTML button, we first design the button structure with HTML. We see the button on the page, but it looks ugly and does nothing.
2. CSS = The Badge, Label, and Lights
After we create the button, we add color and styling so users have a visual picture of the button function. We color a panic button red, for example. This informs users it’s an emergency button.
3. JavaScript = The Dispatcher Connection
The panic button needs to notify emergency personnel by sending a signal. We must add the JavaScript code to make the button work.
4. Outcome = A Ready-to-Use Emergency Alert System
Our emergency panic button is ready to use in an emergency. We know it’s a button with HTML. The CSS styling shows us it’s a red emergency button. When someone presses the button, it alerts the police station using JavaScript.
Frequently Asked Questions (FAQS)
How can I make a button outside a form, still submit a specific form?
Create a separate form, for example;<form id="surveyForm">. Next, create a button outside the form similar to this: <button id="surveyid">. Now in your JavaScript code make sure you add both IDs similar to this: document.getElementById("surveyid"), and document.getElementById("surveyForm").
What do the name and value attributes on a button do?
Both the name and value attributes of a button don't perform any actions. They are metadata for the element. The name identifies the element, often used when sending form data to a server. The value holds the value associated with that element when it’s submitted in a form.
How can a button open or toggle a popover without JavaScript?
Create a div container that holds both the HTML button and the popover div. Give that container a class (e.g., .popover-container). Use the :focus-within CSS selector on the container. When you click the button, the popover appears, if you click outside, it disappears.
Can we create an HTML button that sends data without JavaScript?
Yes, the <button type="submit"> triggers the form submission automatically — no JavaScript needed.
Can I give different submit buttons in the same form, different methods?
Yes, for example; you can create two different buttons inside a form, each using a different HTTP method (GET and POST). formmethod="GET" and formmethod="POST".
Related Lessons (Continue Learning)
- Who Uses Emojis in HTML Buttons?
- When to Turn Off an HTML Button
- Why Use Font Icons Vs SVG Images?
- Where are Emojis Best Used in HTML Buttons?
Conclusion
Wow! Look at What You've Built:
A button with HTML (the structure). Styled it with CSS (the decorations). Made it interactive with JavaScript (the brain). Continue testing and adding new CSS properties to your HTML button project. Each HTML button property will help you design a unique button.